Raising of the Grape Arbor
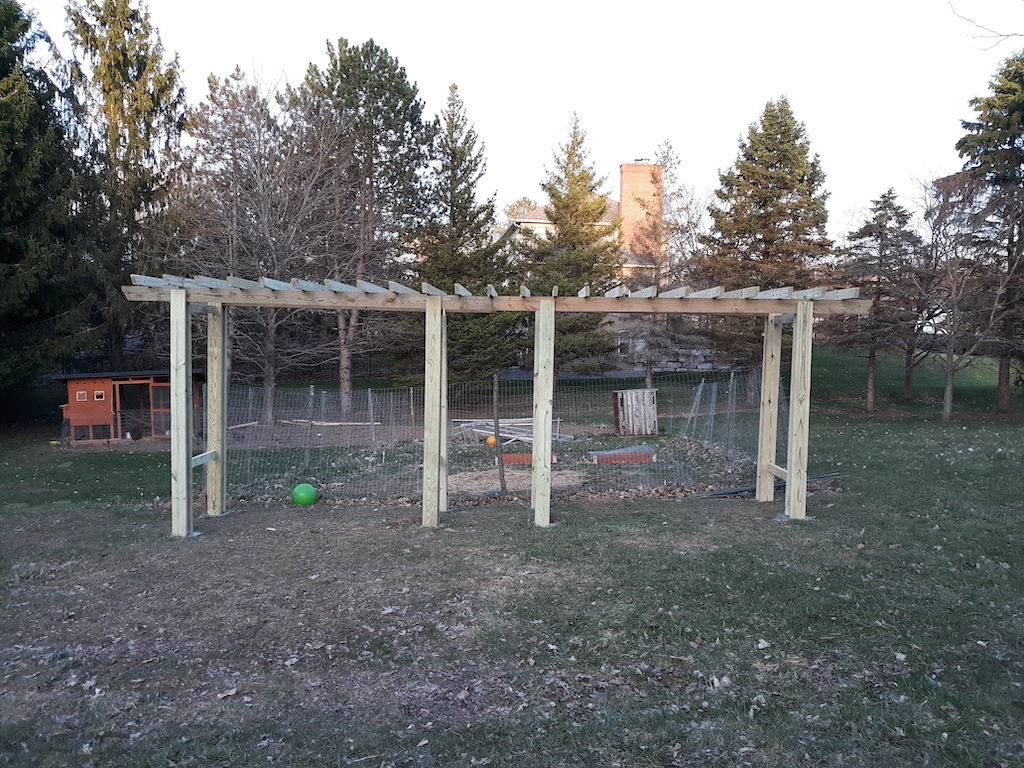
This year’s big project was building a Grape Arbor that would also serve as the future entrance to our garden. Last year I found these plans while searching around and thought to myself you know two of these would span the entire width of our garden. If you are going to do something might as well go all out.
Step 1 – Preparing the Foundation
As with most projects it isn’t as simple as cutting and nailing the wood. First is measuring the locations for the posts and digging some 2 feet deep holes for our cement footers. Doesn’t help that it is April so the ground is still a bit hard to work with and that there are a few tree roots to content with.


Step 2 – Waiting for cement to cure
Or alternatively prep all the wood. Luckily between pouring the cement and starting to raise the arbor I had a conversation with my dad who said it might be easier to use some string to see what level is like and then pre-cut the 4×4 with the proper offsets. Listen to experience it can save you time and pain.


Step 3 – Build
Now that all the prep work is done there is nothing to do but build the arbor. We start by placing the anchors in the center of the cement footers. Make sure you get the proper anchors for the height of your structure. I also raised the wood of the cement on the footers to combat rotting and damage.


For the next part I recommend having a helper to level and hold the posts but as that is not always possible feel free to wing it like I did. After you get the posts up its setting the cross beams, facings and then running the cross beams along the top. Don’t forget to add any decorative touches you desire.


And that is how you build a Grape Arbor / Garden Entrance. With all the pre-measuring / cutting of the wood it was only a solid 4 hours of work to get it all assembled. Now the question is do I stain it, paint it or ?


